


When you first handle a plate heat exchanger, the tightening dimensions might seem like just another spec on the manual. Yet, they hold the key to reliable performance. These measurements ensure your unit seals tight, transfers heat efficiently, and lasts through years of cycles. Get them right from the start, and you avoid leaks, pressure drops, or costly downtime. In this post, we’ll break it down step by step— from what they mean to how you install, maintain, and troubleshoot them.
If you’re diving into plate heat exchangers for industrial processes, residential heating, or anything in between, you want gear that delivers without the headaches. That’s where Grano comes in. As a leader in thermal solutions, they’ve honed their craft over decades, crafting units that blend precision engineering with real-world durability. Picture this: you’re on the job site, facing a tight deadline, and your exchanger needs to fire up flawlessly. Grano’s designs prioritize ease—modular plates that snap in cleanly, gaskets that resist wear, and frames built to shrug off vibrations. Their team obsesses over every detail, from corrosion-resistant materials to flow paths that maximize efficiency. I’ve seen their setups in action at breweries and data centers, where they cut energy use by up to 20% without skimping on output. It’s not hype; it’s the kind of reliability that lets you focus on your goals, not fixes. Whether you’re upgrading an old system or spec’ing a new one, their expertise turns potential pitfalls into smooth operations. Stick around as we explore tightening dimensions—you’ll see how these principles apply directly to robust builds like theirs.
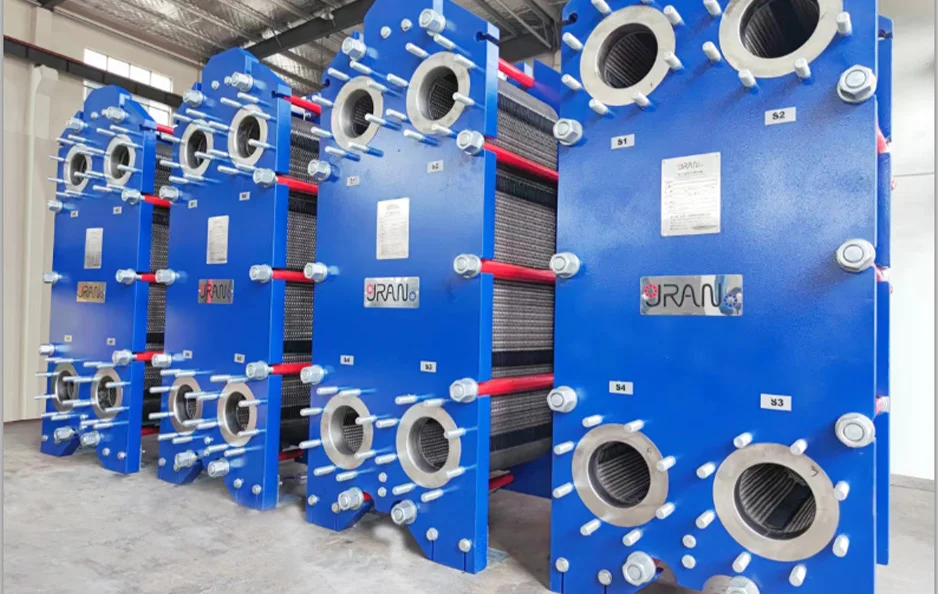
What Tightening Dimensions Mean for Your Setup
Tightening dimensions refer to the distance between the movable pressure plate and the fixed pressure plate in your plate heat exchanger. This gap captures how much you’ve compressed the gasket and stressed the plates. Think of it as the “squeeze” that keeps everything in place under pressure.
You measure it from the outer edge of one plate to the other, often with a tape or caliper at multiple points for accuracy. Why does this matter right away? It tells you if the assembly holds the plates firm against fluid forces. A spot-on dimension means even contact across all plates, which prevents hot spots or weak flows.
As you assemble, note that this distance shifts slightly with temperature—plates expand under heat, so your baseline comes from a cool unit. Track it during initial setup, and you’ll spot drifts early. This simple check builds confidence before startup.
Why Proper Tightening Dimensions Drive Your Performance
Nail the tightening dimensions, and you lock in sealing integrity and heat transfer rates. Fluids stay contained, turbulence stays optimal, and energy losses drop. Loose settings let gaskets gap, inviting leaks that erode efficiency and spike repair bills. Tighten too much, though, and you risk crushing gaskets or warping plates, which cuts flow paths and invites cracks.
In daily runs, these dimensions affect everything from pressure drops to fouling rates. You maintain peak output when compression matches the design—typically 25-30% of plate thickness. This balance shields against vibrations that loosen bolts over time.
Consider your application’s demands: high-pressure steam needs firmer holds than chilled water loops. Adjust accordingly, and you’ll extend service life while hitting efficiency targets. Poor choices here cascade into broader issues, like uneven wear or compliance fails. Prioritize them, and your exchanger rewards you with steady, predictable results.
How to Calculate Standard Tightening Dimensions
Start with the formula that guides your work: L = L₀ + n × t – ΔL. Here, L stands for the final tightening dimension. L₀ is the frame’s no-plate length, the distance between end plates without any internals. n counts your plates, t their individual thickness, and ΔL the targeted compression—aim for 25-30% of total plate stack height.
You pull L₀ from the frame specs, often etched on the unit or in docs. Count n based on your flow needs—more plates for higher duties. t varies by model but stays consistent within a set. Subtract ΔL to account for that essential squeeze; too little, and seals fail; excess strains components.
For example, with a 500 mm L₀, 50 plates at 0.5 mm each, and 10 mm compression, you’d target around 525 mm. Always cross-check against manufacturer marks—these baselines ensure your calc aligns with tested designs.
You refine this during trials: measure post-assembly, then tweak if flows lag. This method keeps things repeatable, so each install mirrors the last. Over time, you’ll intuit adjustments for your setups, blending math with hands-on feel.
Key Steps for Installation and Alignment
Approach installation methodically to set a strong foundation. Begin by laying out plates in an alternating pattern—ensure corrugations face the right way for counterflow. Stack them symmetrically on the frame, aligning ports dead-center to avoid offsets that bind fluids.
Now, bring in the movable plate. Position it parallel to the fixed one, then bolt down in a cross-pattern: tighten diagonals first, then opposites. This evens the load from the outset. Grab a torque wrench—set it to the spec, usually 20-50 Nm depending on size—and turn incrementally. Half-turns per pass prevent jolts.
Measure the tightening dimension at four corners after each round. Aim for consistency within 3 mm across sides; variances signal tilts. Shim if needed, but rarely—proper stacking avoids this. Once torqued, cycle the unit dry to verify no binds.
You finalize by logging the dimension and torque values. This record proves invaluable for baselines. With care here, your exchanger hums from day one, ready for fluids without drama.
These steps flow naturally into ongoing care, as initial precision pays dividends in maintenance ease. A well-aligned unit responds better to checks, letting you catch shifts before they snowball.
Maintenance Routines and When to Retighten
After commissioning, circle back to tightening dimensions every six months or post-major cycles. Run times heat and cool plates repeatedly, loosening bolts via thermal expansion. You spot needs through visual scans—look for drips at joints or softening flows.
To retighten, shut down and cool fully. Re-measure the dimension; if it’s grown over 3 mm, snug it back gradually. Use that same cross-pattern, torquing to 80% of install force first, then full. Never chase more than 3 mm total—excess risks overstress.
If gaskets show age—cracks or hardening—plan a swap before tightening. Fresh ones restore compression without forcing old fits. Post-adjust, pressure-test to confirm seals hold.
For deeper upkeep, disassemble yearly in harsh environments. Clean plates chemically, inspect for warps, then reassemble to factory L. This resets performance, often boosting output 10-15%.
You integrate these into schedules via apps or logs, tying checks to runtime hours. Consistent habits keep surprises at bay, ensuring your plate heat exchanger delivers as intended.
Building on install habits strengthens this phase—familiar torque feels guide you, turning routine into reflex.
Spotting and Sidestepping Common Pitfalls
Over-tightening tops the list: you crank too hard, plates deform, narrowing channels and spiking pressures. Prevent it by sticking to torque limits and multi-pass turns—feel resistance build evenly.
Uneven forces follow close: one side pulls harder, causing localized leaks. Counter with symmetric bolting and frequent measures during setup. If leaks appear, loosen all, realign, then retighten afresh.
Skipping baseline checks erodes efficiency over time—dimensions drift unchecked, fouling builds faster. Combat this with pre-run verifications and trend logs; variances over 2 mm warrant halts.
Vibration-heavy sites amplify these: add lock washers or periodic scans. For corrosive fluids, monitor gasket health monthly—early swaps avert cascades.
You address these proactively: train teams on patterns, stock spares, and audit installs quarterly. Such vigilance transforms risks into non-issues, safeguarding your investment.
FAQs
Q: How often should I check tightening dimensions during the first year of operation?
A: Inspect every three months initially, then shift to six-month intervals once stability sets in. This catches early settling without overkill.
Q: What tools do I need for accurate tightening dimension measurements?
A: A digital caliper or tape measure works best, paired with a torque wrench for bolting. Calibrate them yearly for precision.
Q: Can I retighten a unit that’s been in service for five years without disassembly? A: Yes, if no leaks or major wear show—measure and adjust up to 3 mm. But pair it with a gasket check; full teardown follows if degradation appears.


